In Sage, there some many benefits and advantages that grow your business to success. But with that, you also face many issues, when Sage Accounts Installation Errors, and problems while working in your Sage account. You must require the solutions and methods to fix all types of glitches to get back to the flow of your work.
Here in this article, all you get to know about the solutions to the problems and errors that you face at the time of installation. So, you get to know what type of issues you can face and the solutions to fix them.
There are many issues that you get while installing the software. Whether you are installing it from scratch or installing the update. All the issues that you all get have to be resolved. These issues can be damaged files of software, missing files, download corrupted, connection issues, system requirements not being fulfilled, Windows is outdated, admin access issues, and many more. To identify the reason for the cause that you are facing and then implement the solving method accordingly.
What are the reasons that cause the Sage accounts installation errors?
Let’s talk about what are the reasons that cause you any kind of installation problem in your Sage account. As everyone does not face the same problem so various reasons cause the user to be stuck while installing the Sage. The list of some of the reasons that cause the Sage Accounts Installation Errors are as follows:-
- There is a problem with the Microsoft .NET Framework
- Windows of the system are not up to date
- Data service is not available on this system or machine
- The download was corrupted or damaged
- Some files for the installation is missing or corrupted
- Antivirus is blocking the installation on your device
- Administrator access issues
- Windows Registry is corrupted
- System requirements are not fulfilled.
Need Help for: Sage Accounts Installation Errors Chat Now
What are the 3 basic things that users must check for it?
Before proceeding to another solution according to the Sage Accounts Installation Errors, you must check these 3 basic things:
1. System Requirements
- Processor Speed
- 2Ghz or higher than this
- Screen Resolution
- The screen is between 1024×768 and 1920×1080
- Microsoft .NET Framework
- The version of .NET Framework 4.7.2 or higher than this
- Operating System and Server
- Windows OS- Windows 7, Window 8.1, Windows 10
- Windows Server- Windows Server 2008 R2, Windows Server 2012 R2, Windows Server 2012, Windows Server 2016, Windows Server 2019.
- RAM (Random Access Memory)
- Minimum 2GB
- 4GB for 64-bit system
- Integration Microsoft Office
- MS Office 2010, 2013, 2016, 2019 (32-bit)
- Office 365
- The Internet Connection
- Internet Explorer 11 as the default internet browser
- Internet connection is a must to keep the Sage Software version up to date
- The speed of the internet for download is 4Mbps and upload is 2mbps that is Minimum.
2. Windows Update
In Windows Update, you can do updates manually and automatically. In manually you have to check for it and then download and update it. But in automatic your system let you know about the available update and then update your system. In the manual update you have to follow the process:-
- For Windows 7
- First of all, open the Control Panel
- Then in the Control Panel window, click on the System and Security
- Further, select the option Windows Update
- Now, select the update and click on the Install Updates.
- For Windows 8
- In your system, go to the Settings of Windows
- Then click on the Change PC Settings option
- Further, select the Update and Recovery
- Click on the Windows Update
- In this, you can see a button check for updates click on it.
- For Windows 10
- In your system, go to the Start menu
- Click on the Settings
- Then select the option name Update and Security
- You have to click on the Windows Update
- In Windows Update, click on the button name Check for Updates.
3. Administrator Access
If your administrator access is hidden then you have to enable it. For this, the steps are as follows:-
- In your system, open the Run window
- Then type cmd in it and press the enter button
- Now a window of Command Prompt opens up
- Then type the net user administrator / active: yes
- Then click on the Enter button
- Now type the Exit and then click on the Enter button again.
- The Administrator account is visible to you when you log in to your system.
What are the errors that you have to troubleshoot Sage Accounts Installations?
There are some specific errors that you get in your Sage accounts installations. So, you have to troubleshoot it to fix the issue by following their methods accordingly. Some errors that are not specific or you get some error code also that needs to be resolved to get back to work. Below you get the troubleshooting steps according to the reason for the Sage 50 accounts installations. The list of the Sage Accounts Installation Errors, issues, problems with solutions are as follows:-
Error: “The installation was interrupted before Sage 50 accounts could be successfully installed. Error code 0X80070643”
Solution 1- You have to install directly from the installation files
Sage Accounts v24 and higher versions
- In your system, open the Run window
- Now type the %temp% and then click on the Enter button
- Then double-click on the folder of Sage accounts
- After that double-click on the packages folder
- In this, click to open the Sage50Accounts_dataAccess.msi
- An installation wizard opens up
- In the wizard, follow the instruction to properly and successfully install the software
- Double-click on the following and then follow the instructions in the wizard:-
- Sage50Accounts_Clients.msi
- Sage50Accounts_RepotsPack.msi
- Sage50Accounts_ODBC_x64.msi
Sage 50 Accounts v23 and lower versions
- Firstly, go to the Start menu
- In the start menu, click on the type field then type Run and press the enter key
- It opens up the Run window
- Then type the %temp% and then press the enter button
- Go to the Sage Accounts folder and then double-click on it to open it
- In the folder, double-click on the Sage 50 Accounts v23.msi file to start the installation
- The installation wizard opens up and then you get the procedure that you have to follow
- After this, you are done with the installation.
Solution 2- You have to uninstall the .NET framework and then again install it
In this, you have to firstly uninstall or remove the Microsoft .NET Framework using the Control Panel. After that, you have to install the latest version in your system. This helps you in resolving the issues that you are facing because of this framework. Try t install it properly without any problem.
Need Help for: Sage Accounts Installation Errors Chat Now
Error: The installation was interrupted before Sage Accounts could be successfully installed. Service Sage 50 Accounts Service could not be stopped. Verify that you have sufficient privileges to stop system services v25 and above
For this, you have to stop the services of the Sage account and then download and install the Sage software to start the services again.
- Initially, you have to restart your system to do everything in the refreshed system
- Now open the Run window by pressing the Windows + R keys from the keyboard
- In the Run window that opens up, type Services.msc and then press the Enter button
- In the opened window you have to right-click on the Services that are as follows:-
- Sage 50 Accounts control vXX
- Sage 50 Accounts Services vXX
- (The XX is the version of the services.)
- After that, click on the Stop for both the services after right-clicking on it
- Now download and install the software Sage 50 again in your system
- Again open the Run window by pressing the Windows + R keys together
- In the text field of the Run window, type Services.msc and press again to open the services window
- After this, check the status of the services that are started or not after installing the Sage 50 in your system
- If the status of the services is not started then you have to right-click on it and click on the Start option.
Installation – Error 1920 when installing Sage Accounts
There are cases that you have to check which case belongs to your cause so that you can implement the solutions accordingly. The cases with their solutions are as follows:-
Case 1- When Sage 50 Accounts Data Service failed to start
- To fix this cause you have to open File Explorer by pressing the Windows + E keys on your desktop using the keyboard
- The window of File Explorer opens up
- Go to the path C:\Program Files\Sage\AccountsServiceVXX (32-bit), C:\Program Files (x86)\Sage\AccountsServiceVXX (64-bit)
- Now, you have to right-click on the following services and then select the Delete option
- The services on which you have to right-click are as follows:-
- Sg50Svc_vXX.sqlite3-Shm
- Sg50Svc_vXX.sqlite3
- Sg50Svc_vXX.sqlite3-wal
- After that, you get a confirmation window in that click on the Yes button
- In the end, close everything and install the Sage 50 software again.
Note- XX is the version of the software.
Case 2- When Service Sage Auto Update Manager Service failed to start
There are many things that you have to do and check accordingly by following their steps. So the solutions to fix this case are as follows:-
1. Reboot your system
Restarting your system to refresh the system and then start freshly all the applications to resolve the issues. Try to restart it as an Administrator that resolves many of the issues you are facing in running the applications. There are ways to restart your system that are as follows:-
- In your system, go to the Windows Start menu then click on the Power button then further click on the Shutdown and select the restart option
- From your keyboard, press the Alt + F4 keys together then a window name Shut down Windows window opens up. Then select the Restart option and click on the Ok button.
- To restart as the Administrator, you have to check for the Administrator privileges in your system. The steps are:-
- Open the Control Panel in your system
- Then in the View By options select the Large icons option
- Now click on the User Accounts then further click on the Manage User Accounts
- In this, if you see the Administrator in the Group column for your user name. then you have the access to an administrator
- So you can restart your system as administrator.
2. End all the processes related to Sage that are running in the background
- In this, press and hold the Ctrl + Alt + Delete keys together to open the Task Manager
- You get a screen with few options, from that you have to select the Task Manager
- The Task Manager window opens up on your desktop, then click on the tab named Processes
- Search for the process with the name Sage.Central.AutoUpdateManager.Services.exe then select it
- Press the button End Process or End Task to end or stop it
- fIn the end, close the Task Manager window and install the Sage 50 software again in your system.
3. Clear all the temporary files
- Open the Run window
- Go to the Start menu
- Then in the Search field type Run and press enter
- It opens up the Run window on your desktop
- In the Run window text field, type the %temp% and then press the enter button to open it
- A window opens up that has all the temporary files
- In this, press and hold the Ctrl + A keys together
- After that, press the Delete button from the keyboard or click on the Delete option shown in the top menu window further select permanently delete
In the confirmation box, click on the Yes button.
4. Disable your system’s antivirus
- In this, you have to disable the antivirus temporarily for running the Sage 50 software properly. As the software is blocking the Sage 50 actions because of security reasons.
- You can also exclude the Sage 50 files from the antivirus by configuring the settings properly or providing access to the Sage 50 to work in the flow.
5. Change or modify the permissions
- For this, open the File Explorer in your system
- Then go to the drive C: and then open the Program Files (x86) if you have 64-bit windows and in case of 32-bits open the folder Program Files
- In the Program Files or Program Files (x86) folder, right-click on the Common Files folder
- Then select the Properties option from the shown options
- In the Properties window, click on the Security tab, and in this click on the Advanced button below
- A window opens up named Advanced Security Settings for Common Files
- In this, in front of the Owner click on the Change option or Edit option
- Select the Administrator then click on the OK button and the Apply button.
- Again, right-click on the Common Files folder and select the Properties option
- Go to the Security tab and click on the Edit button
- You have to give everyone full access except the Creator Owner
- After this, click on the OK and then the Apply button
- Again repeat the steps from (i to l) for the folder Sage
- After that, open the Sage folder
- Again repeat the I to l steps for the AccountsServicevXX
- Go to the C:\Program Files or C:\Program Files (x86)
- Open the Common Files folder then open the Sage folder
- In the Sage folder, double-click on the Central and then also double-click on the Auto Update Client
- In this, you have to right-click on each file
- After right-click, follow the process:-
- Select the Properties and go to the Security tab
- Click on the Advanced button and then click on the Change or Edit in front of the Owner
- Check that the Administrator is the owner
- Verify the permissions and folder owner that is applied to the folder of Common Files as </br> to Sage, Central, and Auto Update Client
- In the end, install the Sage 50 software.
Error: Error 5100 when installing Sage 50 Accounts

To fix the issue you have to download, install, and run the Microsoft .NET Framework Repair Tool. The steps are:-
- Download the Microsoft .NET Framework Repair Tool from a quality source
- Then start the installation of the Tool
- After installation Run it by right-clicking on it and selecting the Run option
- After opening the tool troubleshoot the issues that you are facing
- You have to apply the fixes to the glitches
- Repair all the versions of the framework that you have in your system
- Collect logs and then you are done.
Installation error- There was a problem installing .NET 3.5, NET 4.6, or .NET 4.7
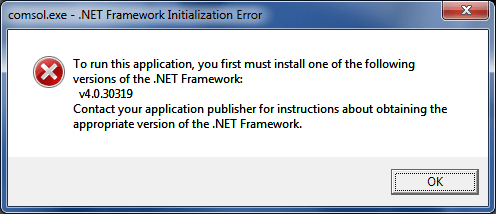
Solution 1- Install Windows update
In this, check for the update of Windows and then install the updates to fix the issue. The steps are mentioned below:-
- In your system go to the Windows settings
- Then click on Windows update
- In this click on the button Check for updates
- It shows you the updates if the updates are available
- Then you have to download it and install it
- After that start the Sage installation in your system.
Solution 2- Re-enable Microsoft .NET Framework 3.5
- Go to the Windows Start menu
- Open the Control Panel by double-clicking on the option of Control Panel
- In the window of Control Panel, click on the option Programs and Features
- You have to select the Turn Windows features on and off
- After that click on the checkbox named Microsoft .Net Framework 3.5.1
- In this, if you are facing issues with it then you have to download and install the Microsoft .NET Repair Tool in your system
- Click on the OK button.
Need Help for: Sage Accounts Installation Errors Chat Now
Solution 3- Download and install the Microsoft .NET Framework Repair Tool
- Download the Microsoft .Net Repair Tool in your system
- Also, tick mark the NetFxRepairTool.exe that downloads Microsoft’s Privacy Statement
- Now select the Privacy Statement for Microsoft .NET Repair Tool.rtf
- Press the Next button to proceed further
- If the box prompts up for saving the file then browse for the location where you want to save it and then click on the Save button
- Double-click on the downloaded file NetFxRepairTool.exe
- Select the Run option
- In the installation window, click on the box of I have read and accepted the License terms
- Then click on the button Next and then on the finish button.
Error 1935: An error occurred during the installation of assembly component v25

In this, check the Windows update, then check for the MS .NET Framework, and if it is required then install the latest one to use it.
Solution 1- Verify and check Windows update
For Window 8 and below
- Press the Windows + R button from the keyboard together to open the Run window
- Then in the text field of the Run window, type wuapp and then click on the Ok button or press the Enter button
- Now click on the Check for updates
For Windows 10
- Open the Start menu by pressing the Windows button from Keyboard or you can also click on the icon of Start menu from the mouse
- Click on the Settings then the window of settings opens up
- Click on the Windows update option
- Then click on the button Check for Updates.
In this, if you have recently installed the Windows update then do once check again for the update to verify that your Windows are up to date.
Solution 2- Enable the Microsoft .NET Framework 3.5
- Go to the Windows Start menu
- Open the Control Panel by double-clicking on the option of Control Panel
- In the window of Control Panel, click on the option Programs and Features
- You have to select the Turn Windows features on and off
- After that click on the checkbox named Microsoft .Net Framework 3.5.1
- In this, if you are facing issues with it then you have to download and install the Microsoft .NET Repair Tool in your system
- Click on the OK button.
Solution 3- Install Microsoft .Net Framework 4.6.1
- Firstly, download and save the Microsoft .Net Framework 4.6.1
- Then for the installation, double-click on the downloaded file
- The installations start then follow the steps that are displayed while installation
- After completion starts using the framework.
Installation- Error 1101: Could not allocate a new page for the database because of insufficient disk space in the primary file-group

- Open the Run window in your system
- Press the Windows + R keys together that opens the Run window
OR - Type the Run in the search field of the Start menu and press enter
- Press the Windows + R keys together that opens the Run window
- In the run window, type MSIC/UNREGISTER and press the Enter button
- Again in the Run window, type MSIC/regserver and press the Enter button
- Now, you are done, and check for the error.
Error 1304: Error writing to [filename] verify that you have access to that directory
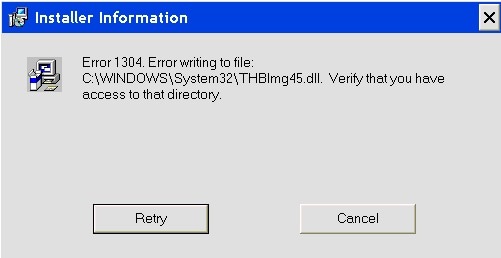
- Firstly, you have to search for the file that is mentioned in the error shown to you
- Rename the file by right-clicking on it and then click on the Rename option
- Now add the old at the end of the file and press the Enter button
- If it shows you that you won’t have permissions to rename the file
- Then check for the permissions on the folder and file that are shown in the error message
- Configure the permissions for changing the file name
- If still not working then again install the software and check that you logged in as the administrator.
Error 1324: The folder path contains an invalid character
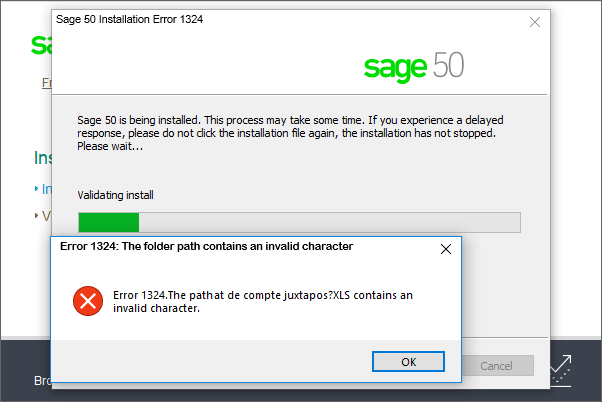
In this Sage error code 1324, you have to try to run the installation of the software as the administrator. For this go to the file of installation then right-click on it and from options select run as administrator. You can also use the different windows profile to install the software.
Error 1402: Could not open key or Error 1608: Unable to create Install Driver instance

- In your system, open the Run window
- Type CMD and then press the Enter button
- The CMD (Command Prompt) window opens up
- Now type in this window SFC/SCANNOW and then click on the Enter button
- You have to log in to your Windows as a different user with full Administrator rights
- Install the software using this user in your system.
Error 1603: When you try to install a Windows Installer package: A fatal error occurred during Sage Accounts Installation

- Initially, you have to uninstall and reinstall the Sage 50 software in your system
- Open the Control Panel
- Then click on the Programs and features
- Select the Sage and then select the Uninstall option
- Follow the instructions to uninstall it
- After this, install the Sage software package in the folder that is not encrypted or in the drive that is not accessible as a substitute drive
- Allow full access to the system account
- Open the File Explorer in a system where you are installing Sage software
- Right-click on the drive in which you want to install the software and then select Properties
- In the Properties window, click on the Security tab
- Verify the user names or group that have the user account of the system
- If the user is not available then to add the user to follow the steps:-
- Click on the Edit then if you get any window for approval for UAC then approved it
- Then click on the Add button and select the Select Users or Groups
- Now enter the name of the object to the select field
- Type the SYSTEM in it and click on the check names
- After that click on the OK button.
- For changing the permissions, click on the Edit button and then approve the UAC when asked
- Click on the System user account then check in the section of Permissions
- In permissions set the full control as Allow
- Now close the Permissions and then return to the Properties
- Click on the Advanced option
- Select the Change Permissions and if asked for approval of User Account Control then approve it
- In the section of Permissions, click on the System entry, and then click on the Edit
- You have to click on the Applies to and from the options select the This Folder, subfolder, and Files
- Then click the OK button
- The operating system applies all the permissions that you just change for all the child folders
- In the end, run the Windows Installer Package.
Need Help for: Sage Error 1606 Chat Now
Error 1606: Could not access network location
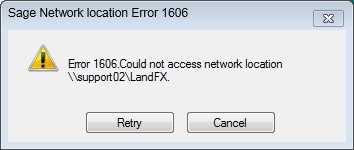
- In your system, open the Run window
- Type Control Panel and then click on the OK button to open it
- You can also open it by clicking on the Start menu then select Control Panel and open it
- Click on the View by option and then click on the Large icons option
- After that click on the User Accounts
- Select the Manage User Accounts
- Check for the Administrator that it is displaying in the Group or not for your user name
- If it is shown then you have Administrator access.
Error 1618: Another Installation already in progress

- Restart your system first before doing anything
- Disable and then enable the Windows Installer service
- Check and verify that you are logged in as the Admin
- Go to the Start menu and then search for the Computer Management and press the Enter button from the keyboard
- Open the Services and Management by double-clicking on it
- Again double-click on Services to open it
- Open Properties of Windows Installer
- Go to the Start-up type then click on the Disable option then click on the OK button
- Reboot your system
- In Start-up type click on the Manual and then follow the steps b to f
- Now retry the installation again in your system.
- You have to terminate the installer process in there is any remaining
- Press Ctrl + Alt + Delete keys together
- Then click on the Task manager
- In the Processes tab select the processes and then click on the button End Task
- The processes to end are as follows:-
- Install.exe
- Msiexec.exe
- InstallShield
Error 1919: Error configuring ODBC data source when installing v25
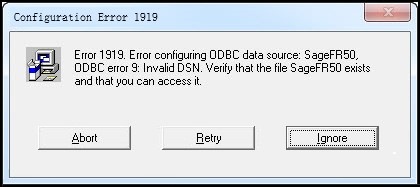
- Log into your Windows operating system as an administrator
- Install the Sage software again in your system
- If you are getting the same error message then follow:-
- Press Windows + R keys together to open the Run window
- In the text field, type %temp% and then press the Enter button
- In the window opens up double-click on the Sage Accounts
- After that, double-click on the Sage 50 Accounts v25 or Sage 50 Accounts v25.msi file
- In the end, you are done and you won’t get any issues after this.
Error 1923: Sage Data Service could not start
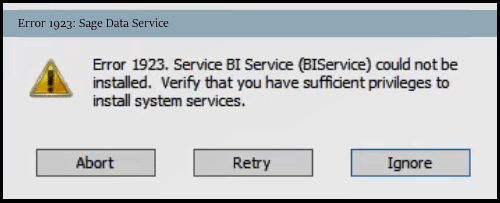
- Initially, restart your system as an Administrator
- Then Install the Sage 50 software in your system
- Now if you are facing the error
- Then open the Run window
- Type the Services.msc in the text box and then press the Enter button from the keyboard
- In the opened folder, you have to search for the Sage 50 Account Services and then note down the correct or exact name of it.
After getting the exact name of service of Sage 50, follow the steps:-
- Close this service window that is opened in the above steps
- Open the Run window again
- Type the CMD to open the Command Prompt and then press the Enter button
- In Command Prompt window, type sc delete (the name of the service file that you noted above) then press the Enter button
- Type Exit and then press the Enter button again
- Reboot your system as an administrator
- Now try to install the Sage software in your system.
Need Help for: Sage Runtime Error Chat Now
Installation- Runtime Error! Program: C:\Windows\syswow64\MsiExex.exe-R6034
- You have to first go to the location that is according to the system 32-bit and 64-bit
- For 32-bit- C:\Windows\System32
- For 64-bit- C:\Windows\System64
- Now search the files and rename them one by one by mentioning old at the end of the file name. The files are-
- Msvcr80.dll
- Msvcm80.dll
- Msvcp80.dll
- Right-click on these files to rename them
- After this, install Sage again
- Repeat the steps 1 to 3 that back your files to the original names.
Final words!!
All the information about the troubleshooting of Sage Accounts Installation Errors is gathered here only for you. So, that you get all the information in one place and can resolve the problem easily according to the error caused to you.
For any other query or issue, you can easily connect with the Sage 50 experts team. The team is available 365 days a year to help you out of all the problems. You get assisted by the professional team who is here to help you all the time whenever required.
